How to Create Heat Distortion
Last week I showed you how to create a lightning storm, but this week I wanted to show you something a little hotter... Heat Distortion! This is an effect frequently seen by those who live in hotter climates. Heat distortion occurs when the ground becomes so hot that the rising heat waves distort your view and perception.
This tutorial is an adaptation of the idea presented in Matt Ebb's displace node tutorial.
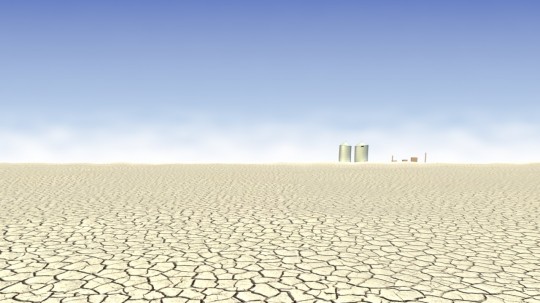
The finished result:
Close up:
Before starting a project it's important to saturate yourself with as much reference material as you can, so you can see how the effect appears in the real world.
Photo: Matt Audet
Photo: Ken Koller
Photo: Michael Gwyther-Jones
You may wish to watch these stock footage clips as well:
Ready to create the effect yourself?
Bring the heat!
To play along at home, download the starting .blend file.
Setting up the scene
1. Start by adding a plane and placing it directly in-front of the camera. Rotate the plane so that it complete blocks the view of the camera.
Later we will apply a texture to this plane that we will use to apply a distortion map. When it moves past the camera, the texture we apply will distort the view behind it.
2. First we need to increase the height of the plane so that it moves past the camera. Scale the plane along the Z-Axis till it's x4 as tall (Press, S, Z, 4, Enter)
3. Position the plane so that the top of it is covering the camera.
4. Move to frame 250 and positing the plane so that the bottom of the plane is covering the camera.
5. With the plane still selected, switch to the graph editor.
In the graph editor you should see a curved line for the Z Location line (blue line).
This curved line creates a problem as it makes the plane move at a non consistent speed (starting slow then speeding up, then slowing down again). To fix this we need to make the curve line straight.
7. With the blue curve selected, hit H and in the popup menu select Vector.
The curve should now be straight:
This will move the plane at a consistent speed throughout the animation.
If you have done everything right, pressing Alt+A now will look like this:
The faster the plane moves, the more rapid the heat distortion will look.
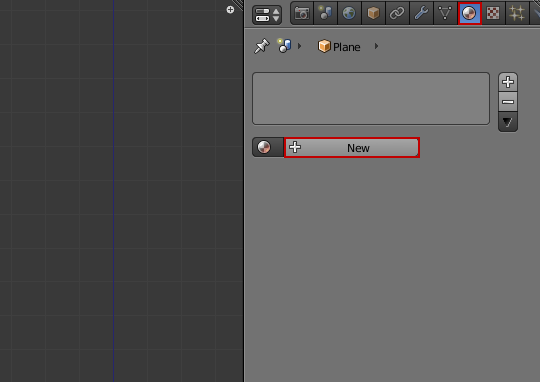
9. With the plane selected, add a new material.
10. Leave all the options as default, but check Shadeless and uncheck Traceable so that the plane doesn't cast a shadow.
11. Switch to the texture panel, and add a new texture.
12. Leave the default texture slot to Clouds, but change the size to 0.10 and the depth to 1.
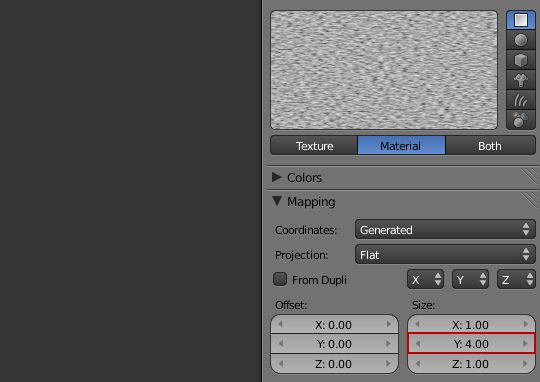
13. Because we have scaled the plane vertically we need to increase the mapping size Y to 4 to ensure the texture doesn't stretch.
14. Change the texture color to black.
Distorting the scene
With the basic scene setup we can now move onto the scene distortion.
15. With the plane selected, move it to a separate layer with nothing else on it. I have used layer 4.
16. In the render options, press the + button to add a new render layer.
17. Rename the Render Layer to 'Heat Distortion' and select the layer you moved the plane to.
18. Switch to the compositor (Shift+Right Arrow).
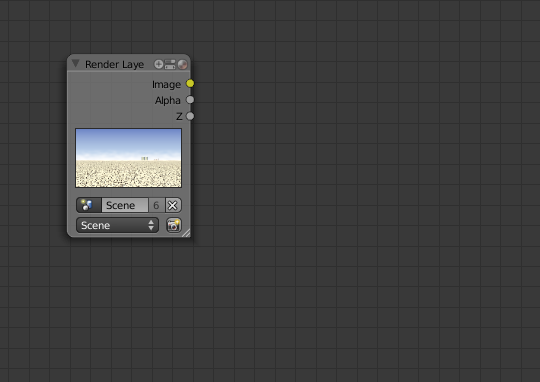
19. Add a new render layer (Add>Input>Render Layer), from the layer drop down list select Heat Distortion.
21. Add a displace node (Add>Distort>Displace). Connect the scene render layer to the image input and the Heat Distortion render layer to the Vector input. Set the X and Y value to 10.
This displacement node has now warped the scene with the cloud texture:
The only problem is that the entire image has been warped regardless of the distance from the camera.
In real life heat distortion builds up over longer distances. To simulate this effect we will setup a node array to distort the image relative to the Z depth pass.
Increasing the distortion over long distances
22. Add a Map Value node (Add>Vector>Map Value) and connect it to the Z-depth output. This will allow us to edit the Z-depth pass. Set the Offset to -7.00 and the size to 0.020 (these measurements will vary according to your scene). Connect the output to a viewer node to see the results.
You should have a result like this:
The darker the area, the less that area will be distorted.
23. Connect the output from the Map Value node to a ColorRamp node (Add>Converter>ColorRamp)
This will remove unwanted artifacts by converting the Z-Depth to an easy to read B&W output.
24. Add a Mix Node (Add>Color>Mix) and connect the output from the scene render layer, and the displace output into the mix node inputs.
25. Connect the output from the ColorRamp into the Fac input. This will use the Z-depth pass as a mask for the two inputs.
The scene now becomes more and more distorted the further objects are from the camera.
Creating a noisy depth of field effect
26. Add a defocus node and connect the image input to the mix output. Connect the Z input to the Z output of the scene render layer.
27. Check Use Z-Buffer so that the defocus node uses the Z-input. The fStop will define how shallow to make the depth of field. I have set mine to 10. To create a noisy depth of field effect, leave Preview checked. The lower the number of samples, the more grainy the effect looks.
Creating a Mirage
This step is optional depending on your scene, but you can create a mirage effect by adding a plane with a mirror material, or simply by raising your objects off the ground. I chose the later:
The finished animation:
Close up:


